Tag: How to

  • Simple Solutions to Fix Missing String Table Entry in Valorant

    Simple Solutions to Fix Missing String Table Entry in Valorant

    Confused about how to fix the “missing string table entry” valorant error? This article will help you with exactly that

    missing string table entry valorant

    The recently launched multiplayer first-person shooter game, Valorant, has already gained considerable popularity worldwide. But besides providing players with intriguing gameplay, this free-to-play game has also been in talks for various bugs and errors. The missing string table entry is one of the many.

    If you are someone who has been experiencing the same, then the good news is you don’t need to worry much. According to many players, some basic fixes can help resolve the “missing string table entry” error easily. With that being said, let us look at the steps that you can start applying once you find yourself troubling with the same issue.

    Related Posts:

    How to Fix the Missing String Table Entry Valorant Error

    Fix #1: Logging yourself out of the game

    login to fix valorant missing string table entry

    The very basic thing that you can do to solve the “missing string table entry” is to log out of your game and then log in again.

    • While you are on the Main Menu of the game, hover over to the left side, you will find an option called “Log Out” Click on that.
    • After that, restart the game. 
    • Once the main screen appears, log in to your account using the required credentials.

    Fix #2: Restarting Your Device

    restart to fix missing string table entry valorant

    If logging in and out from your game didn’t help resolve the “missing string table entry” error, the next thing you can do is get your device restarted.

    • Hit the escape button on your keyboard or the main menu button on your controller.
    • From the main menu, hit the exit option to quit the game entirely
    • Once done, restart your device
    • After your device boots up, launch the Valorant game to see if the error is resolved

    Fix #3: Visiting Some Top-Notch Gaming Forums

    visit forums to fix missing strings table entry

    Suppose you still face the “missing string table entry” error even after doing all the resetting. In that case, you can visit various trusted game forums and look for the discussions that other players are having about the error. We recommend you specifically visit the forums that are built around the Valorant game. 

    After visiting any of the relevant forums, you can simply ask other players about the issue and learn if they implemented any special method that helped them resolve the “missing string table entry” error.

    Fix #4: Getting in Touch with the Support Team

    Are you still upset, considering the fact that none of the methods mentioned above helped you get your game back? Well, then the last thing that you are left to do is contact the Valorant team. 

    • Visit Valorant or Riot Support on Twitter and leave them a message highlighting the issue you are facing.
    • Alternatively, you can also visit the official website of Riot Games and seek help from the support team there.

    Final Words

    The prime reason behind players facing the “missing string table entry” error in Valorant being still unknown, we can expect the developer Riot Games to come up with a full-fledged solution to this real soon. Although the scenes of getting an official update on this are still indefinite, the steps mentioned above can come in real handy for resolving the error and getting your game back on track.
  • Guide for Fixing Dev Error 6034 Modern Warfare

    Guide for Fixing Dev Error 6034 Modern Warfare

    A recent discomfort has just made its way for most Call of Duty Modern Warfare lovers out there. According to the sources, many players have reported an issue where their games are getting crashed suddenly with an error message “Dev Error 6034.”

    Occurring generally due to the presence of any unreadable or corrupted data within the game, the error is not limited to any specific platform. To help you out, we have prepared the list of best fixes that can resolve the dev error 6034 on desktop and consoles.

    fix dev error 6034

    Related Posts:

    How to Fix Dev Error 6034 in your PC

    # Fix 1: Have your Graphics Driver Updated

    gpu update to fix error 6034

    Outdated or broken GPU drivers play a significant role in making your favorite game crash suddenly. So, before moving into the complex methods of getting the Dev Error 6034 fixed, make sure to have your graphic drivers updated. Many a time, this simple approach will help you resolve the error instantly.

    • Head over to the official website of your GPU manufacturer
    • Search for your GPU model
    • Download and install the latest version available
    • Restart your system

    # Fix 2: Replacing the Corrupted File (s)

    modern warfare fix error by removing corrupted files

    If updating the graphics driver didn’t help resolve the issue, you need to get yourself into an advanced approach of finding and fixing corrupted or broken files within the game.

    • The very first thing that you need to do is find and open the Call of Duty Modern Warfare installation folder.
    • Once you are in the folder, search for the following files: “.Product,” “vivoxsdk_x64.dll,” “Modern Warfare Launcher.exe,” “Launcher.db,” and “patch.result” and delete them.
    • After that, open Battle.net
    • Hover over to the settings cog, and look for “options”, click on that.
    • The next thing you need to do is select the “Scan and Repair” option and begin the scan.

    The files will then get repaired, and you will be able to play the game again.

    How to Fix Dev Error 6034 in your Xbox

    # Fix: Get Rid of the Multiplayer Game Packs

    solve error code 6034

    Solving Dev Error 6034 in consoles takes a fresh approach altogether. Most times, users have discovered that removing specific game packs can help resolve the issue conveniently.

    • Launch your Xbox and select the Call of Duty Modern Warfare
    • Then press the menu button and from the list, select “Manage Game and Add-Ons,” and if necessary, select the “Manage Installation on External Drive” option.
    • Once done, scroll down and make sure you unselect the MP2 Pack and the Multiplayer 3 Pack.
    • Restart your console and check if your game is working fine

    How to Fix Dev Error 6034 in your PS4

    # Fix: Uninstall Multiplayer Game Packs that Might Cause Issue

    solve error code 6034

    • Hover to the game on your console
    • From the main menu, make your way to the “Options” tab.
    • Navigate to “General” and scroll down to select the “Game Installs.’
    • Select the recent multiplayer packs and click uninstall.
    • Once the process is complete, restart your device.

    Final Words

    If you find yourself in trouble even after applying these fixes, the last thing left for you is having your game reinstalled. Whether you face the issue on your desktop or console, removing the previous file and installing a fresh one will help you instantly resolve the error. However, we recommend you try the fixes mentioned above appropriately and avoid the hassles of reinstallation.

  • Guide for Fix Valorant Error Code 39

    Guide for Fix Valorant Error Code 39

    Having issues with Valorant Error Code 39? Let us walk through the solutions.

    fix valorant error code 39

    Valorant from Riot Studios is one of the most popular first-person tactical shooter games that are available right now. Despite being fairly new, the game has already started gathering attention worldwide. However, just like any other game, Valorant is home to certain annoying bugs as well, one of which is labeled as the error code 39.

    The Valorant Error Code 39 is an issue that majorly corresponds to connectivity failures. When a user encounters this issue, he/she receives an error message on the screen with little to less detailing. Having said that, finding the appropriate fix might get a bit challenging. 

    Related Posts:

    How to Fix Call of Duty Error Code 664640

    How to Fix Fortnite Error Code 91

    Best Ways to Fix Valorant Error Code 39:

    # Fix 1: Restart Your Game and Try Again

    restart game to solve error39

    Restarting your game is the very first thing that you can do to solve the error code 39. Besides doing so, you can also go on and restart your device. Restarting your device will help you resolve some other temporary connectivity issues that might also play a crucial part in resolving the error code 39.

    • Hit the required button of your controller/keyboard to get yourself in the game’s main menu
    • From there, find and click on the Exit option
    • Restart your device
    • Once your device boots up, log in to your game once again.

    # Fix 2: Make Sure Your Internet Connection is Up and Running

    check internet

    Poor internet connectivity might also end you up facing various in-game issues like the error code 39. So, it is crucial to make sure your internet connection is well optimized. To check if your internet is working fine enough, head over to your browser and start browsing along with different websites. If you seem to face any trouble, try out the following fixes.

    • Restart your router or whatever device you use for accessing the internet. Make sure you unplug all the internet cables and put them back before continuing with the restart process.
    • If nothing seems to work out, contact your internet service provider.

    # Fix 3: Wait for the Game Servers to Get Fixed

    server issue

    One of the prime reasons for the Valorant Error Code 39 is the game servers getting down for technical failures of some sort. The only thing you are left to do in such a scenario is to have patience and wait until the issue is resolved. As soon as the game servers get back to life, you will be able to start enjoying your game once again. The best way of keeping track is to get updates from the official Twitter page on the Valorant server status.

    Final Words

    Considering the fact that Error Code 39 is sort of a connectivity issue, the steps mentioned above can come in real handy for resolving the same. However, if it is the game servers that correspond to the major part of the issue, you can expect future updates from Riot Studios that shall fix the error once for all.

  • Everything You Need to Know About Fixing HBO Max Error Code 420

    Everything You Need to Know About Fixing HBO Max Error Code 420

    fix HBO Max error code 420

    “HBO Max Error Code 420”, facing a similar issue? Let’s walk through the solutions then.

    HBO Max is one of the most popular video-on-demand streaming services in America. But alongside users admiring their favorite shows, many even end up facing various errors. Among many, the most popular one is the error code 420. However, the good news is, you can get rid of the error easily by implementing some quick fixes.

     How to Fix HBO Max Error Code 420

    Fix #1: Ensure Your HBO Max is Updated

    update hbo max to resolve error code 420

    • Head to the App Store on iOS or Google Play Store on Android devices
    • Hover over to the Update on iOS or My apps and games section on Android devices
    • Look if the HBO Max app is yet to get updated to the latest version, if so click on Update
    • Wait until the app gets updated and then restart your device to be on the safer side.

    Fix #2: Restart the HBO Max App

    Suppose you are facing the error code 420 even after getting the latest version of the app. In that case, the next thing you can do is restart the app. Just like most the cases, restarting is one of the primary ways of troubleshooting errors. After you get your HBO Max restarted, there is a probability of the error code 420 getting resolved; if not, proceed to the next fix.

    Fix #3: Make Sure to Check Your Location

    As per the current scenes, HBO Max is limited to the users in the US and some of its territories only. So, the chances of you facing the HBO Max Error Code 420 are high if you seek to use the service from other regions outside of the US. In that case, you can seek other solutions that genuinely help in accessing HBO Max content from other parts of the world without any issue.

    Fix #4: Disable VPNs 

    Disable VPN to resolve error code 420

    • Go to the settings of your device
    • Under the general section, you will find an option called VPN, click on that
    • Toggle the switch to turn the VPN status to “Not Connected”
    • Once done, restart your device

    Fix #5: Have Patience

    Considering the heavy traffic that goes in the HBO Max every day, server failures are among the common issues. As a result of these failures, users often face the 420-error code. The best thing you can do in that situation is having patience and wait till the server issues get resolved. You can check the status of such issues on varied forums or Downdetector.

    Final Words

    Here you have the list of best approaches that can help you get rid of HBO Max error code 420. However, if none of the about mentioned fixes helped you get rid of the error code, the last thing that you can do is communicate with the official support team. To do this, you can visit Contact HBO and let the team of experts know about the issue you are dealing with. You can then expect the support team to come with a solution real soon.

  • How to Delete McAfee from Mac

    How to Delete McAfee from Mac

    Tired of the McAfee antivirus repeatedly pestering you with notifications and pop-ups on the side? Here’s how you can delete McAfee from the Mac OS system the easy way.

    For as long as computers have existed, so has been corrupted software that lands viruses and malware on to them. While Windows and Linux have been plagued by all sorts of adware, malware, trojans, and viruses, Apple has kept macOS X fairly safer in comparison. The company was able to do so by creating a closed ecosystem and controlling every aspect of the operating system, which continues to do to this day.

    Related Posts: 

    However, this does exempt macOS X from viruses, which is why third-party antivirus software developers also extend their services to Mac users. Over the years, antivirus software providers have increasingly become intrusive, which not only download other add-on services automatically but also ruin the user experience with unsolicited pop-ups and notifications. At times, McAfee has also been accused of such deeds, which is why you would want to know how to delete McAfee from Mac machines.

    Method 1 – Remove McAfee from macOS using the Finder

    The first and most straightforward way to uninstall McAfee antivirus from the macOS X system is just how you would uninstall any other app.

    How to Uninstall McAfee

    1. Close any other program that is running on your macOS computer.
    2. In the Dock bar, click on the Applications menu.
    3. Scroll down to find the McAfee Internet Security Uninstaller and click on it.
    4. Click on Continue and enter the administrator password to confirm your action.
    5. The uninstallation process will now begin, and you can press Finish after the process is completed.

    Method 2 – Delete McAfee from Mac with Terminal

    While using the Applications menu helps you remove most apps, McAfee tends to leave behind apps and files even after uninstalling the main module. A rather expert method to completely remove McAfee from your computer is using the Terminal window with the following steps:

    1. Launch the Spotlight tool and search to open a Terminal window.
    2. In the Terminal window, type in the following line of code:
      sudo /Library/McAfee/cma/scripts/uninstall.sh
    3. Hit the Enter button and then type in the administrator password into the window.
    4. Follow the on-screen instructions to delete McAfee from Mac computer once and for all.

    Finally, reboot the macOS computer, and you will have finally removed from the Mac computer for good.

    Method 3 – Manually Delete McAfee System Files

    One final method to get rid of McAfee software from macOS X computers for good is to select each and every app file and delete it.

    Take Correct Steps to Uninstall McAfee for Mac | WordCamp Mid-Atlantic

    1. Launch the Finder app and click on Go to and select Go to Folder from the drop-down menu.
    2. Search in the following directories for McAfee-related files and delete all of them:
      /Library/Preferences/
      /Library/Application Support/
      /Library/Caches/
    3. Now, open the Trash app and click on Secure Empty Trash so that you remove all of the files stores there.

    Final Words

    The way McAfee has designed the antivirus software, allows add-ons to operate separately from the central service. While the first method may work well on removing the add-ons, you may need to use the more advanced solutions to remove every trace of the antivirus software from the macOS X system.

  • How to Fix Zoom Error Code 3113

    How to Fix Zoom Error Code 3113

    Baffled by the Zoom error code 3113 and don’t know a way to resolve it? Here’s our guide to explain why the Zoom 3113 error occurs in the first place, and how you can quickly resolve it.

    Over the years, communication has become increasingly easier and more affordable, all thanks to the better network infrastructure available. Cellular calls once were expensive, but can now be made free of charge through VoIP calling, and the same goes for video conferencing. You no longer need private servers to be setup for work video meetings, all thanks to services such as the Zoom app.

    In just the past year, Zoom has been a massive game-changer, enabling the socially distanced lives of people around the world to be connected online. During COVID-19 work restrictions, communication through Zoom has been crucial, but it isn’t always perfect. For instance, the Zoom error code 3113 has prevented users from being able to connect to an ongoing video meeting and communicate.

    Why Does the Zoom Error 3113 Occur?

    While most errors when using the Zoom app on the computer or mobile device can be related to internet connectivity, this particular one has to do with the service policy change.

    Zoom Scrutinized As Security Woes Mount | Threatpost

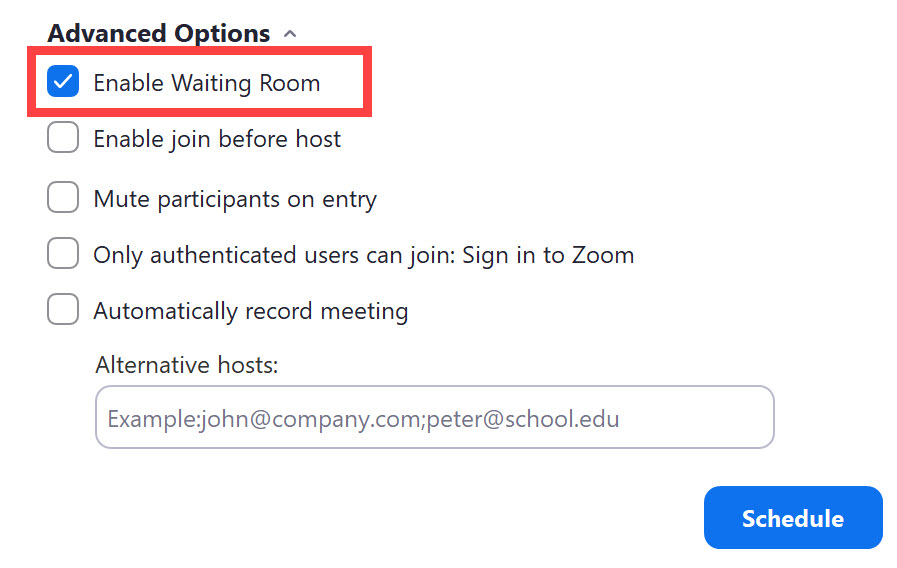
    In September, Zoom updated their policy that required most users hosting a Zoom meeting to set up a passcode, or enable the option of a waiting room for the attendees of the online meeting. In case a host has not created a waiting room or set up a passcode for the meeting, the Zoom error code 3113 seems to appear.

    How to Fix Zoom Error Code 3113

    1. Open a web browser tab and head over to the Zoom website.
    2. Sign into your Zoom account and head to the Account Management section.

    Zoom, Password Protect Previously Scheduled Meetings

    1. Click on Account Settings and then enable the toggle next to the Passcode option.
    2. Confirm your action by pressing the Turn on button on the confirmation window.

    Additionally, you can enable the Waiting Room feature if you do not wish to passcode protect your Zoom meetings.

    1. Open a web browser tab and head over to the Zoom website.
    2. Sign into your Zoom account and head to the Account Management section.

    How to use the Waiting Room in Zoom: Chris Menard Training

    1. Click on Account Settings and then enable the toggle next to Waiting Room under the Security section.
    2. Confirm your action by pressing the Turn on button on the confirmation window.

    Additionally, you can allow Zoom to auto-moderate the waiting rooms by using the Edit Options button.

    Final Words

    Before you proceed with the steps above to fix Zoom error code 3113 on your computer or mobile Zoom meetings, make sure that you have updated the Zoom app. We do hope that the simple guide above was able to help you resolve the problems with the Zoom app, do let us know what you think in the comments section below.

  • How to Fix ThinkPad Lenovo Camera Freezes in Zoom

    How to Fix ThinkPad Lenovo Camera Freezes in Zoom

    Are you having a hard time trying to get video call working on your ThinkPad because Lenovo camera freezes in Zoom app? Here’s how you can get a quick fix to this annoying issue right away.

    When you consider communication and its important in the modern world, the place of video calling cannot be understated. For personal use when trying to connect to your loved ones, or getting a meeting done with associates in different parts of the world, video conferencing is the standard of communication.

    How to Fix the Issue of Lenovo Camera Freezes in Zoom

    Users have reported that an ongoing Zoom call session abruptly stops in between, or fails to launch entirely. Apart from freezing for the Zoom app, the ThinkPad camera does not seem to work for other camera apps either.

    Fix #1 – Turn off Privacy Mode

    In an attempt to make their laptops more privacy-friendly, Lenovo has a built-in Privacy Mode that prevents the camera from sending out live images. Although the feature does not restrict using most camera apps, it might interfere with the functioning of the Zoom app.

    Video Not Working on Lenovo Devices – Zoom Help Center

    1. Click on the Windows icon and search for Lenovo Settings or Lenovo Companion
    2. If none of these apps are installed already on your ThinkPad, download either of them from the Windows Store app.
    3. Inside the app, scroll down to find the Camera icon and click on it.
    4. On the Camera menu, find the Privacy Mode section and toggle off the switch.

    Fix #2 – Update the Camera Drivers

    If the camera does not seem to work with any other app either, it could point towards the issue of outdated drivers. Moreover, some users have even reported that the Lenovo Camera Freezes in Zoom app after updating it. In this case, you will benefit from rolling back the drivers to an earlier version which worked before a recent update.

    Dell Win 7 to Win 10 webcam not connected (Code 45) - Dell Community

    1. Click on the Windows icon and search for Device Manager
    2. From the list of drivers, find the Cameras tab and click on Integrated Webcam option.
    3. Go into the Driver tab, click on Update Driver and Search automatically for drivers from the menu.
    4. Additionally, you can even choose to Roll Back Driver if the Zoom camera issue occurred after installing a driver update recently.

    Fix #3 – Edit the Registry

    A significant number of users have reported the issue when Lenovo Camera Freezes in Zoom app seems to occur after the Windows 10 Anniversary Update, and is not limited to Lenovo ThinkPad devices alone. A tried and tested method of fixing the issue has to do with modifying the registry files, which should always be done after making a full backup first.

    1. Press the Windows key + R key on the keyboard and type in regedit into the field.
    2. Browse on the sidebar to access the path – HKEY_LOCAL_MACHINE\SOFTWARE\WOW6432Node\Microsoft\Windows Media Foundation\Platform
    3. On the right panel, right-click and select DWORD (32-bit) Value from the drop-down menu.
    4. Select the Value name – EnableFrameServerMode and set the Value data – 0 and press the OK button.

    Restart the computer, and this should most likely fix all of the webcam issues you have been facing on Zoom.

    Final Words

    Owing to the COVID-19 pandemic, the strategic shift to online communication became possible due to the Zoom app, which surged in popularity in the past year. Since it has become the default app for socially distanced personal and business communication, it can be disheartening to see the ThinkPad Lenovo Camera Freezes in Zoom app, but the list above should be able to fix it all.

  • How to Fix Fortnite Error Code 91

    How to Fix Fortnite Error Code 91

    The Fortnite error code 91 can really jam up your gaming experience at the wrong time, so you need to fix it ASAP. Here’s everything you need to know about the issue when playing Fortnite and how to resolve it.

    There haven’t been many games released in the past decade which have been able to garner the popularity or the revenue that Epic Games’ Fortnite has been able to. The Battle Royale genre one-hit-wonder has become a sensation among younger gamers, creating an entire franchise of itself.

    Related Posts:

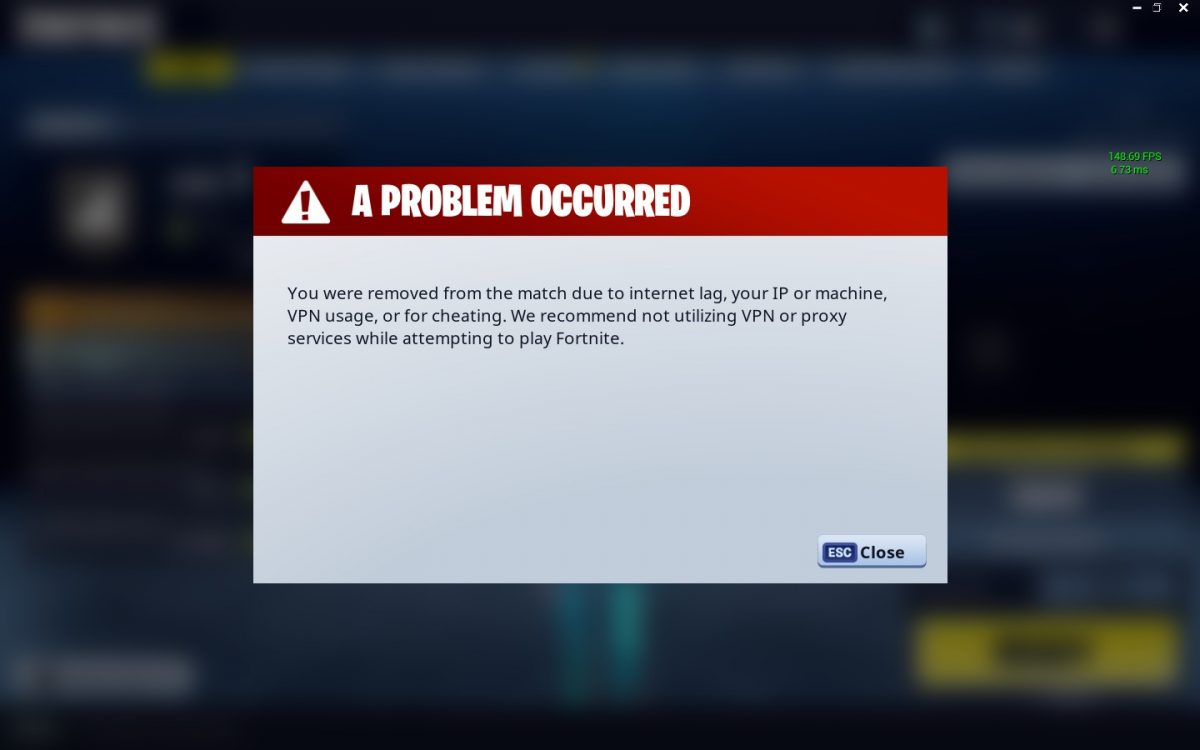
    However, just like any other multiplayer online game out there, Fortnite has its own set of glitches and errors that users need to deal with. One such problem seems to be the occurrence of the Fortnite error code 91 which is limiting some users from connecting with their teammates online. The problem is not limited to the PC version of the game, since users across the board (PlayStation 4, Xbox One, Nintendo Switch).

    Fortnite Error Code 91 for Party Functionality Error! Let's Fix it!

    Guide to Fix Fortnite Error Code 91

    The connectivity issue seems to be the main concern behind the error code popping up, with the message stating “Party services are currently experiencing technical difficulties.” As well as “The party is currently not responding to join requests. Please try again later”. Here’s everything you can do to get rid of the error and begin enjoying Fortnite multiplayer mode:

    Check the game server status

    Fortnite game servers sometimes encounter problems, which can lead to errors popping up for the users. If you need to know if the Fortnite error code 91 is due to the server problem and head over to the official Fortnite Twitter page to find out more.

    Restart the game

    If no known server problems are happening online with Fortnite at the moment, the cause of the error may be the app itself. You can start by closing the Fortnite game and relaunching it, and seeing if the issue is fixed.

    Verify Fortnite game files

    How to Verify Fortnite Files - PwrDown

    Some PC users have also reported a tried and tested way to fix Fortnite error code 91 issues by ensuring that the game files aren’t corrupted. If you are playing Fortnite from the PC, you verify the game files by starting the Epic Games Launcher, heading over to the Settings menu, and choosing Verify next to the Fortnite app icon.

    Switch to a Private Party

    If Fortnite shows an error code when you’re playing in the game party, try switching the party mode from the public server to private. Some Fortnite users mentioned that the trick does work in some cases. 

    Reinstall Fortnite

    In some cases, the only way to fix Fortnite Error Code 91 might be by wiping the entire game. Deleting the Fortnite game and then installing it again is a drastic yet effective solution if none of the suggestions mentioned above has helped. You must remember that the installation file size, especially on the PC version, can be significantly larger so it may take some time to download the game all over again. 

    Final Words

    Remember, that the issue mostly has to do with the internal server issues with either the Fortnite game or the host of the game you are trying to join. However, performing a quick reboot on your wireless router is a good trick to try out as an additional way to fix Fortnite error code 91 on your computer or gaming console.

  • How to Fix Netflix Error CM 12646

    How to Fix Netflix Error CM 12646

    The Netflix error CM 12646 has become part and parcel for several users online, as they flock to the community forums to report it. Here’s everything you need to about this particular error code on Netflix and what you can do to resolve it.

    Ever since the age of digital content has taken over, there is one name in the entertainment industry that has taken over the rest. Netflix has eclipsed online streaming services is more ways than one, spanning across the entire globe, and supporting millions of active users with movies, TV shows, and all forms of other entertaining content.

    Related:

    However, just like any online service available, Netflix is not free from issues and payback errors of its own, which is why the company is actively maintaining an entire library of error codes with explanations to what they mean. One such issue is the Netflix error CM 12646 which displays the message “Cannot play title. Please try again later”.

    What is the Netflix CM 12646 Error?

    After considering the number of users who have experienced the issue, Netflix officially addressed the error in general. Based on the comments and general diagnosis, the issue seems to be related to the mobile app version of Netflix, particularly the one available for Apple iPhone and iPad users and could arise due to:

    1. An outdated version of the Netflix app.
    2. Network connection issue between the internet and the Netflix app.
    3. Issue related to data files or information on the internal storage of the device.

    How to Fix Netflix Error CM 12646

    Now that you have understood the reasons behind why this specific Netflix error occurs in the first place, here’s what you need to do to fix it:

    Solution 1: Reboot the device

    1. Press and hold the Power button on your iPhone or iPad.
    2. On the power screen slide to power off the iDevice.
    3. Once the iPhone or iPad is turned off, press and hold the Power button to turn it on again.

    Solution 2: Remove saved Netflix content

    1. Open the Netflix app and press the Downloads icon at the bottom.
    2. In the list of available offline content, press the Edit button on top of each video.
    3. Press the “X” icon to remove the saved content from Netflix app.
    4. Exit the app, force close the Netflix app and open it again.

    Solution 3: Check internet connectivity

    Since Netflix is an online streaming service, it is obviously going to falter if you don’t have an active and stable internet connection to keep the gears spinning. Even if you do have a stable internet connection, using Netflix from a hotel, university, or public network might cause the Netflix error CM 12646 to show up.

    Start off by making sure that you have an active network connection by using the Safari browser to open a webpage and confirm. Moreover, Netflix may not work on a mobile internet connection if you have it disabled from the settings of the app, so do keep that in mind.

    Final Words

    The offline content has been regarded as the primary cause behind this specific Netflix streaming error. However, there are secondary issues pertaining to your mobile phone, especially the iPhone and iPad that could also lead to this issue. If none of the above-mentioned solutions seems to work, you can also reinstall the Netflix app and try again.

    Were you able to fix up the Netflix error CM 12646 issue and get the unlimited hours of streaming entertainment up and running? Do let us know in the comments section right below.

  • How to Fix Discord 502 Bad Gateway Error

    How to Fix Discord 502 Bad Gateway Error

    The Discord 502 bad gateway error could ruin your online game night with the buddies, and here’s everything you can do to fix it.

    The gaming industry has come a long way from being confined to the living room TV sets, all thanks to the World Wide Web. Multiplayer online gaming is all the rage right now, and a crucial element of online gaming is the ability to communicate efficiently with your teammates.

    Although there is no shortage of VoIP services to communicate over the internet, Discord is among the only one that is made by and for the gaming community. While offering you the ability to share screen, join specific communication channels, and even use the gold-old chat boxes, Discord is great, but it is far from perfect.

    Related: 

    What is the 502 bad gateway error on Discord?

    If you’ve been around the internet long enough, you probably know that the 502 bad gateway error is a common issue with websites and web services. The error is also defined by different websites as “502 proxy error”, the “HTTP 502 error”, “Temporary Error (502)”, and many others.

    The general description of the 502 bad gateway error relates to the web service itself and is mostly out of the reach of the end-user when resolving. When using a web browser, the error is usually fixed by reloading the web page, but since the same cannot be done with Discord, you need to try out alternative methods to fix it.

    How to fix Discord 502 bad gateway error

    Now that you know the reason behind the 502 gateway error that keeps popping up for users on Discord, here’s what you need to do to get past it:

    Solution No.1: Check Discord server status

    Discord VoIP service is built on the servers by Cloudflare, which is the reason every there’s an issue with the Cloudflare servers, it directly affects Discord too. Over the past couple of years, an unusual surge in internet usage, or deployment of faulty updates has caused Cloudflare errors, which has directly caused the 502 bad gateway error on Discord too.

    1. Head over to Discord Downdetector webpage (Link Here).
    2. Here you should be able to see all of the reported problems with Discord in the past 24 hours.
    3. You can choose to also report issues here.

    If there has been an unusual surge in the number of active reported cases for the Discord service, it could point towards a universal issue. The best course of action, in this case, is to wait it out while the development team resolves the problem.

    Solution No.2: End Discord.exe process

    If the Discord app seems to be working fine for your team members, the easiest fix that you can put to use is clean the slate and start again. Since Discord runs as a background process, simply closing the app might not be enough, so you need to end the process from the Task Manager and then try again.

    1. Press the Start icon and search for the Task Manager service.
    2. In the Task Manager window, browse for Discord from the list of running Apps and Background processes.
    3. Right-click on the Discord icon and press the End task button to kill the app service.

    You can now launch the app once again and check to see if the Discord 502 bad gateway error has been resolved.

    Final Words

    Although the bad gateway 502 error on Discord may seem like an internal issue, it is among the most commonly known server issues out there. Your best bet is to wait it out, or in the worst case, reinstall the Discord app to see if it resolves the issue.

    Were you able to fix the connectivity issue with your Discord account using the solutions above? Be sure to let us know in the comments section down below.